DIY Wind Turbine Generator: Build Your Own Alternator
Building a small-scale wind turbine isn't just about the blades and tower; a crucial component is the generator. This article guides you through building a simple, functional generator for your DIY wind turbine project. Understanding and constructing your own generator offers significant cost savings and provides a deeper understanding of how wind energy is converted into electricity. We'll cover the necessary components, explain the principles behind them, and provide a clear, step-by-step build guide. Whether you're a seasoned maker or just starting in the world of renewable energy, this project is both rewarding and educational.
Understanding the Basics: How a Generator Works
At its core, a generator converts mechanical energy (the rotation of your wind turbine blades) into electrical energy. It’s based on Faraday’s Law of Induction, which states that a changing magnetic field induces an electric current. Essentially, a generator consists of a coil of wire (the armature) rotating within a magnetic field. The rotation causes the magnetic flux through the coil to change, generating a voltage. The faster the rotation, the higher the voltage and current produced.
Components Needed
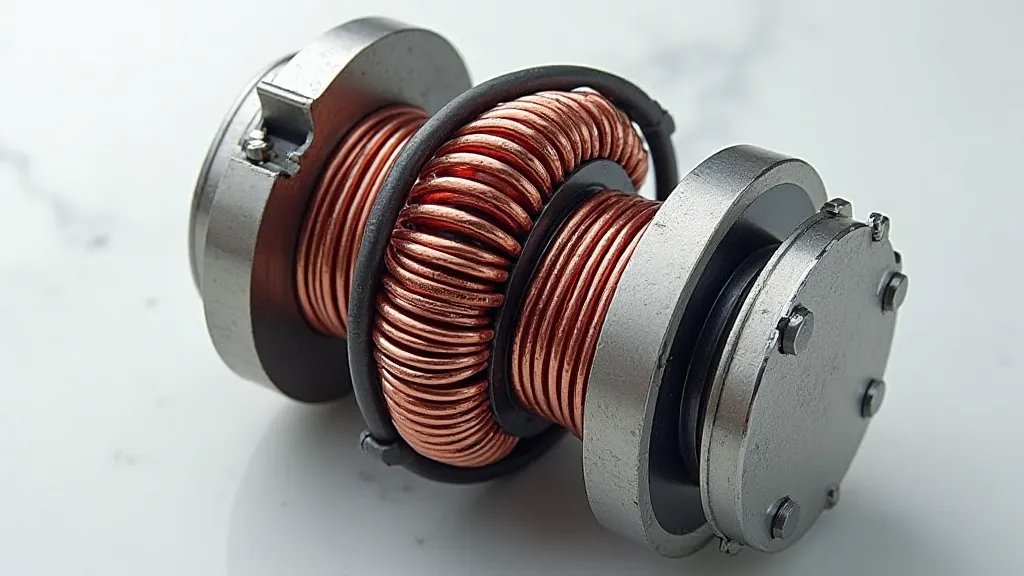
- Neodymium Magnets: These are powerful rare-earth magnets that provide a strong magnetic field. The more magnets, the better the output (within reason, considering cost and space).
- Copper Wire (Enameled): This is the wire that will form the armature (coil). The gauge (thickness) of the wire impacts the current capacity; thicker wire generally allows for more current.
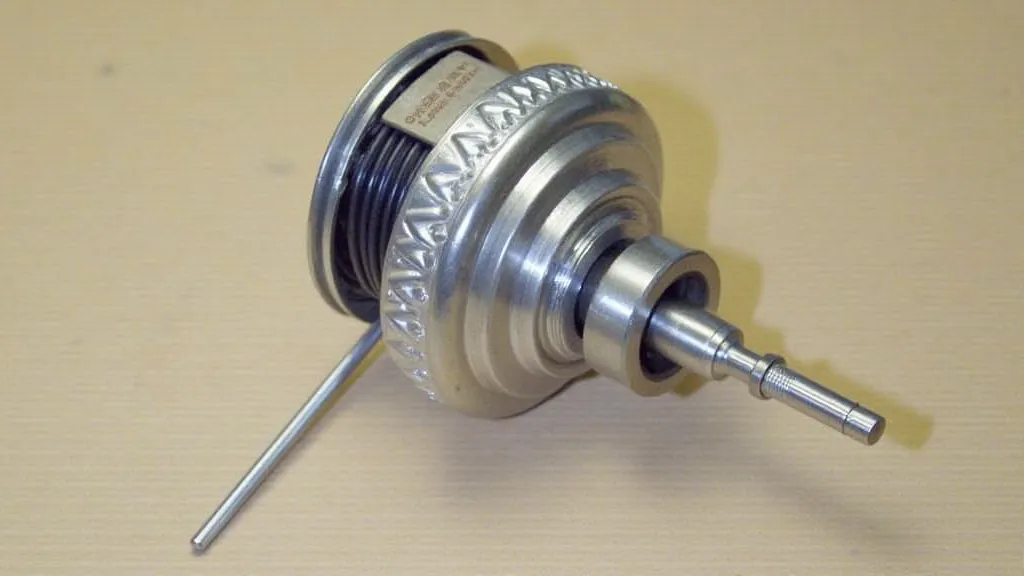
- Bobbin (Non-Conductive Material): This is a former on which you will wind the copper wire to create the coil. PVC pipe, plastic lids, or 3D-printed forms all work well.
- Shaft: A metal rod that connects the generator to the turbine blades.
- Bearings: Reduce friction and allow for smooth rotation.
- Connecting Wires: To connect the generator to your charge controller or battery.
- Epoxy or Strong Adhesive: To secure the magnets and coils.

Step-by-Step Build Guide
- Prepare the Bobbin: Choose a bobbin shape that's easy to wind. A cylindrical bobbin is usually easiest.
- Wind the Coil: Carefully wind the enameled copper wire around the bobbin. The number of turns directly impacts the voltage output – more turns generally means higher voltage. Aim for a tight, even winding. Secure the wire ends to prevent unraveling.
- Apply Varnish (Optional): Applying a thin coat of electrical varnish helps protect the windings from damage and corrosion.
- Magnet Placement: Attach the neodymium magnets to a rotor disc. The rotor should rotate around the coil. The polarity of the magnets should alternate (North-South-North-South) as they pass the coil to maximize voltage generation. Use strong adhesive like epoxy to secure the magnets.
- Assemble the Generator: Mount the coil (armature) and rotor (with magnets) so they can rotate freely with minimal friction. Use bearings to facilitate smooth rotation. Ensure there's a small air gap between the magnets and the coil.
- Test Your Generator: Connect a multimeter to measure the AC voltage output as you manually rotate the shaft.
Troubleshooting
- Low Voltage Output: Check magnet placement, ensure proper winding technique, and reduce the air gap between the magnets and coil.
- Generator Doesn't Spin Freely: Check for obstructions and ensure the bearings are lubricated.
- Overheating: Reduce the load on the generator or improve ventilation.
Safety Precautions
Caution: Neodymium magnets are incredibly strong and can pinch fingers. Handle them with care. Also, electricity can be dangerous; always disconnect the generator when working on the wiring. Wear safety glasses during assembly.
Beyond the Basics
This guide provides a foundation for building a simple generator. Experiment with different coil designs, magnet configurations, and winding techniques to optimize performance. More advanced designs might incorporate features like rectification (converting AC to DC) and voltage regulation to improve efficiency and compatibility with batteries and inverters.